
Baby Shark 3D
Author: ROMAN3D,
Discover the Behind-the-Scenes of Creating “Baby Shark” in 3D
Baby Shark in 3D: From Concept to Realization ! – Dive into the Fascinating World of Baby Shark and Discover the Creative Process Behind This 3D Video.
Creation Process

3D Production: A Deep Dive into the Behind-the-Scenes of Creation
An Exciting Project
The creation of this video took about twenty days. The timing was rather tight. Once the idea was found and the storyboard completed, the process could be launched.
The 3D software used for this video was Blender. This software was chosen for its cost, but also for its regular updates that make it an excellent 3D tool today and a great alternative to paid software.
Some elements were purchased from 3D asset banks to save time in design. However, this time-saving was minimal, as it was necessary to correct the mesh of each of these elements to convert them from mesh triangle to mesh quad and then correct the geometry of the models. This is one of the major drawbacks of current 3D asset banks: having to rework the entire mesh afterwards.
The diving mask was sculpted in ZBrush (Maxon), which remains a software of choice when it comes to working or reworking 3D sculpts.
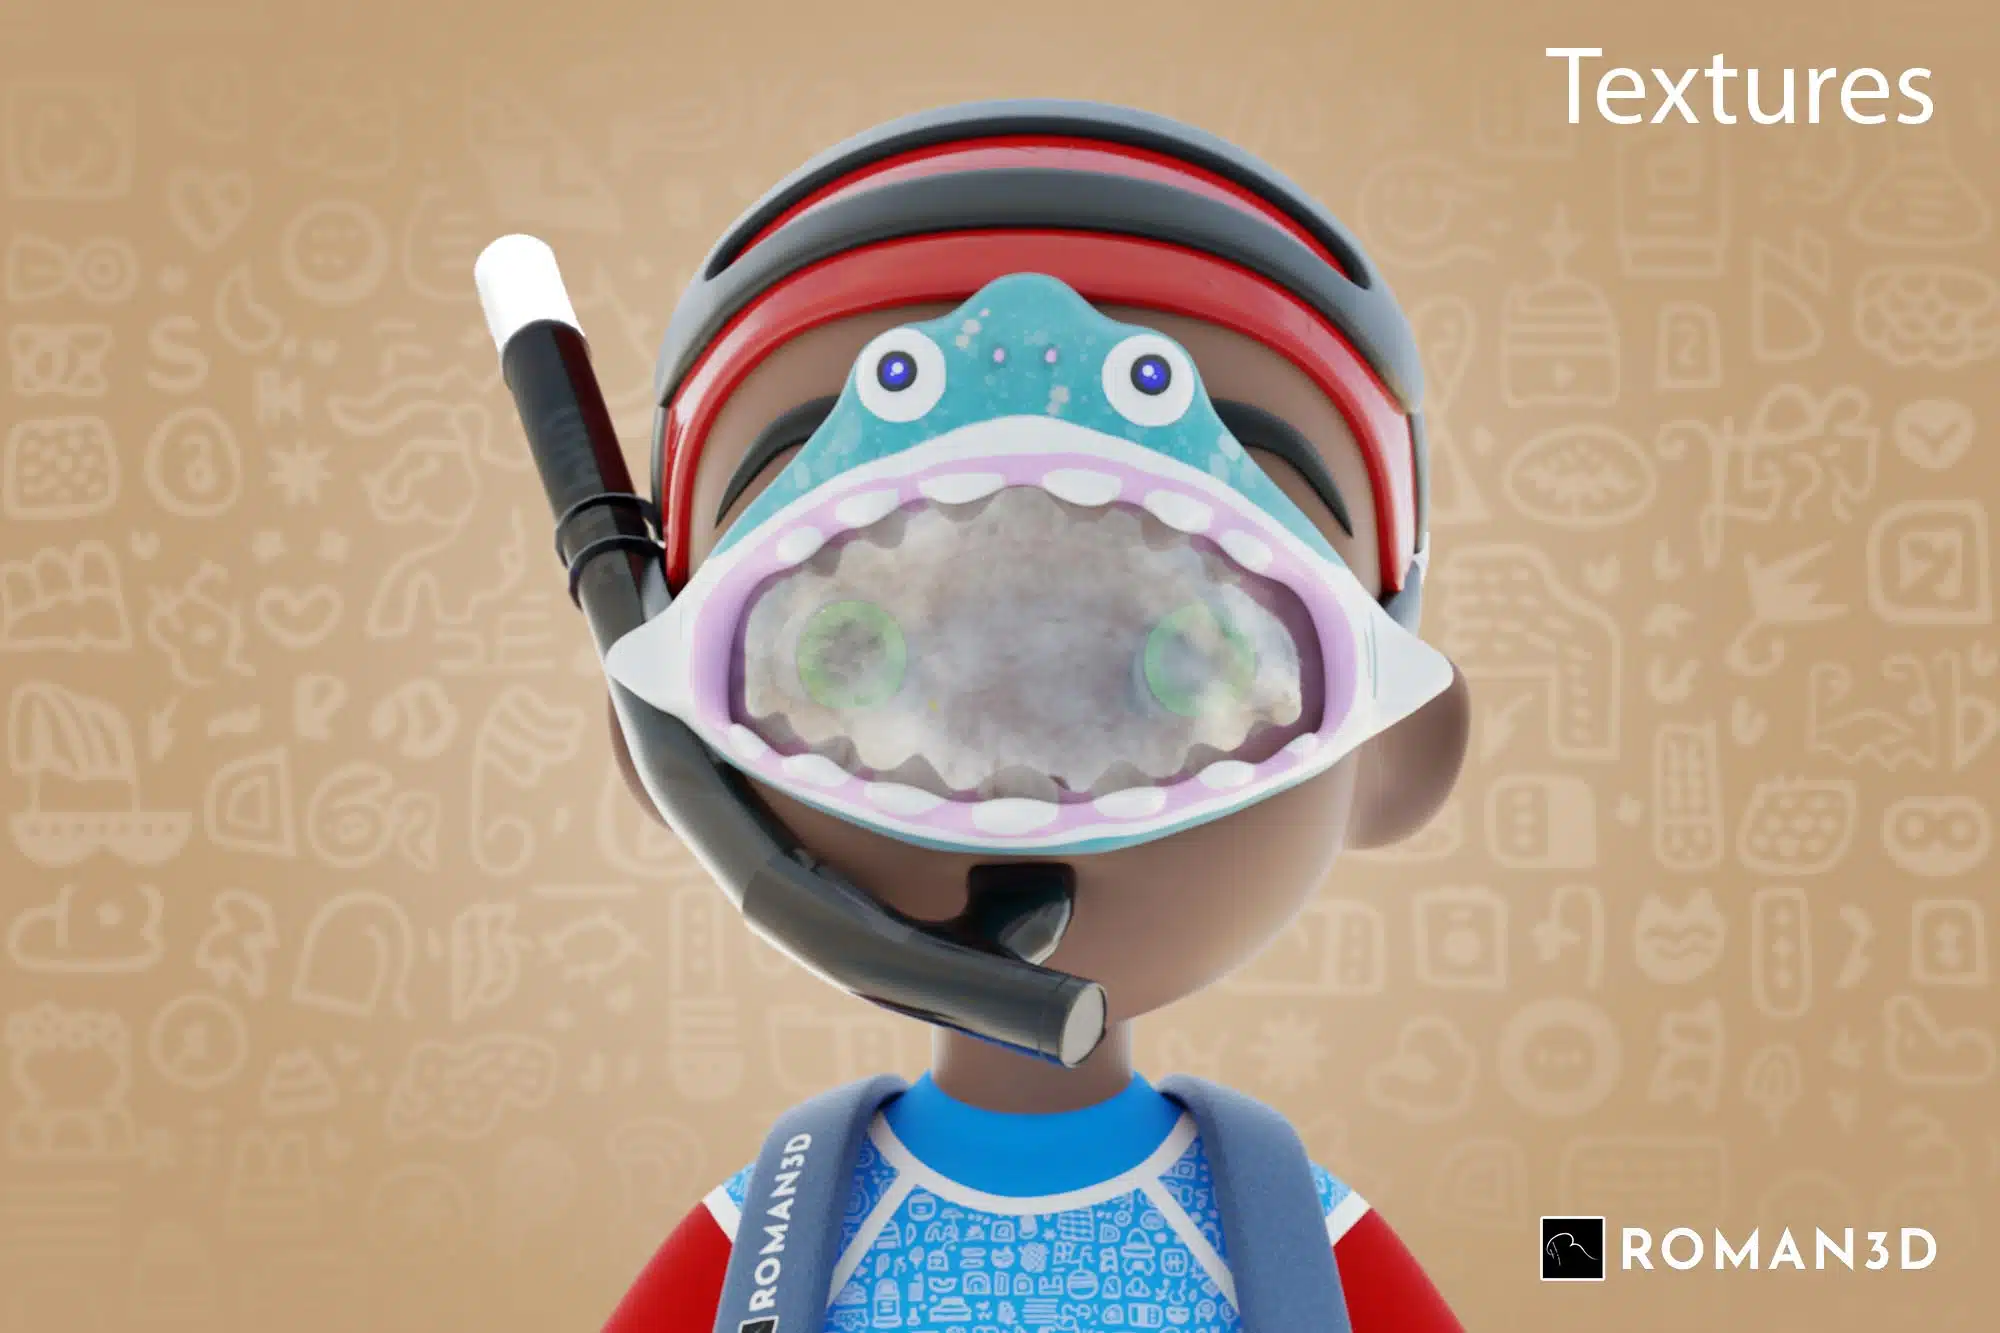
Texture Lighting / Rendering
The textures were created in Substance Painter (Adobe). This software is a real asset when it comes to working with textures. This is how the textures for the diving suit, diving mask, fish, and other elements were created.
The rendering was done with Cycles (Blender). The rendering, lighting, and caustics parameters (yes, these are real caustics!) were defined before applying the textures. This allowed for optimal material work based on the scene.
The goal was not to exceed 3 minutes of rendering time per frame while maintaining good image quality. Despite the effects and SSS (Subsurface Scattering), the settings allowed for a rendering time of 2.30 minutes per frame, which was excellent.
Rigging Animation
WHEN THE VIDEO COMES TO LIFE
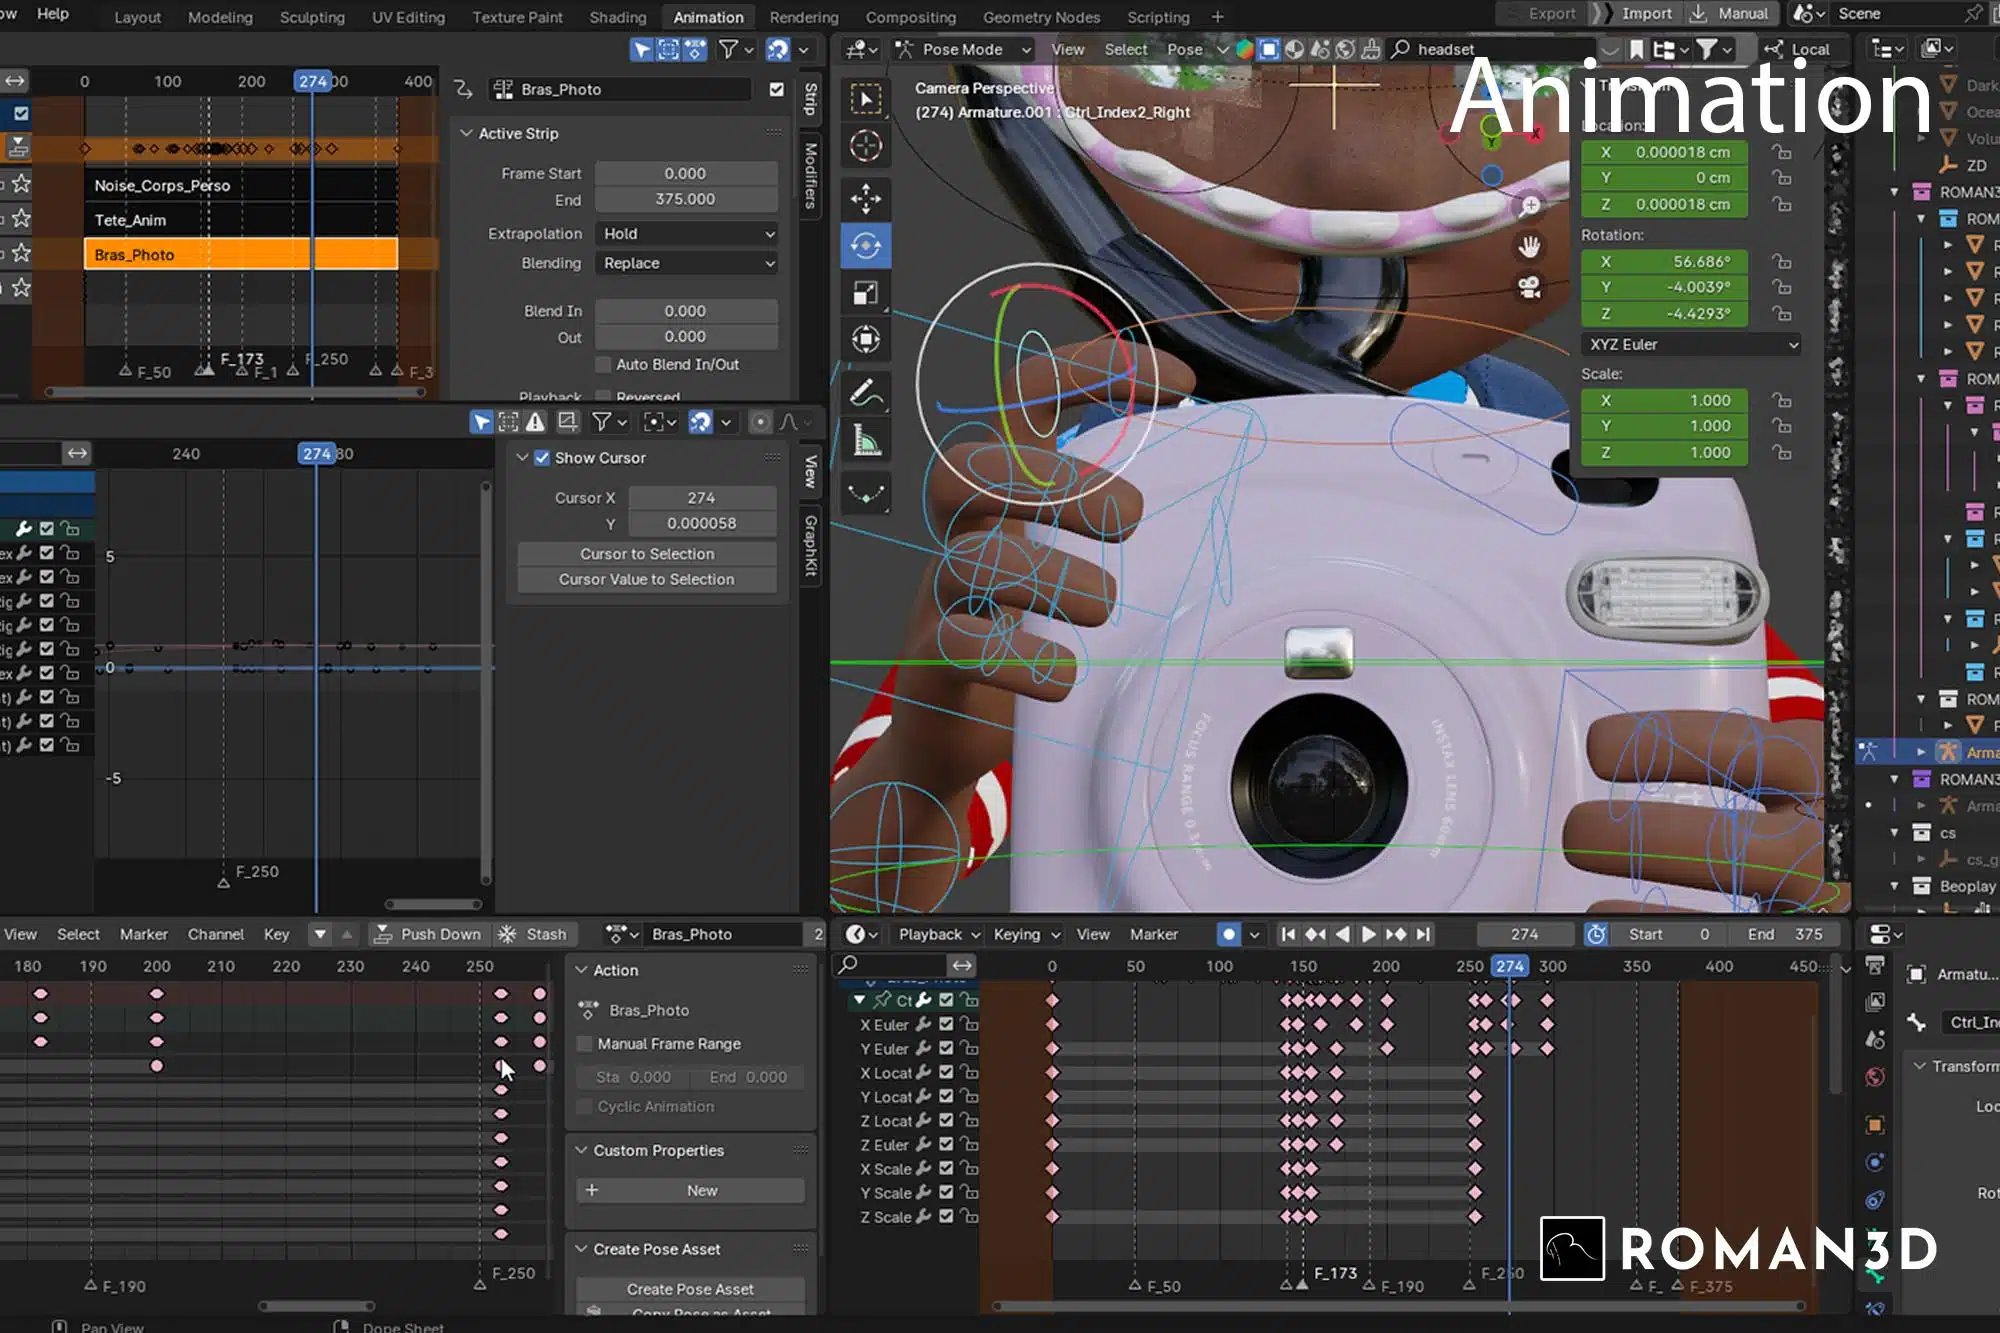
When the video comes to life, it’s the result of meticulous work where each step is crucial. Among the most important, 3D rigging and animation stand out for their technicality and importance in the final rendering.
Bringing the Animation to Life: A Ballet Between Rigging and 3D Animation
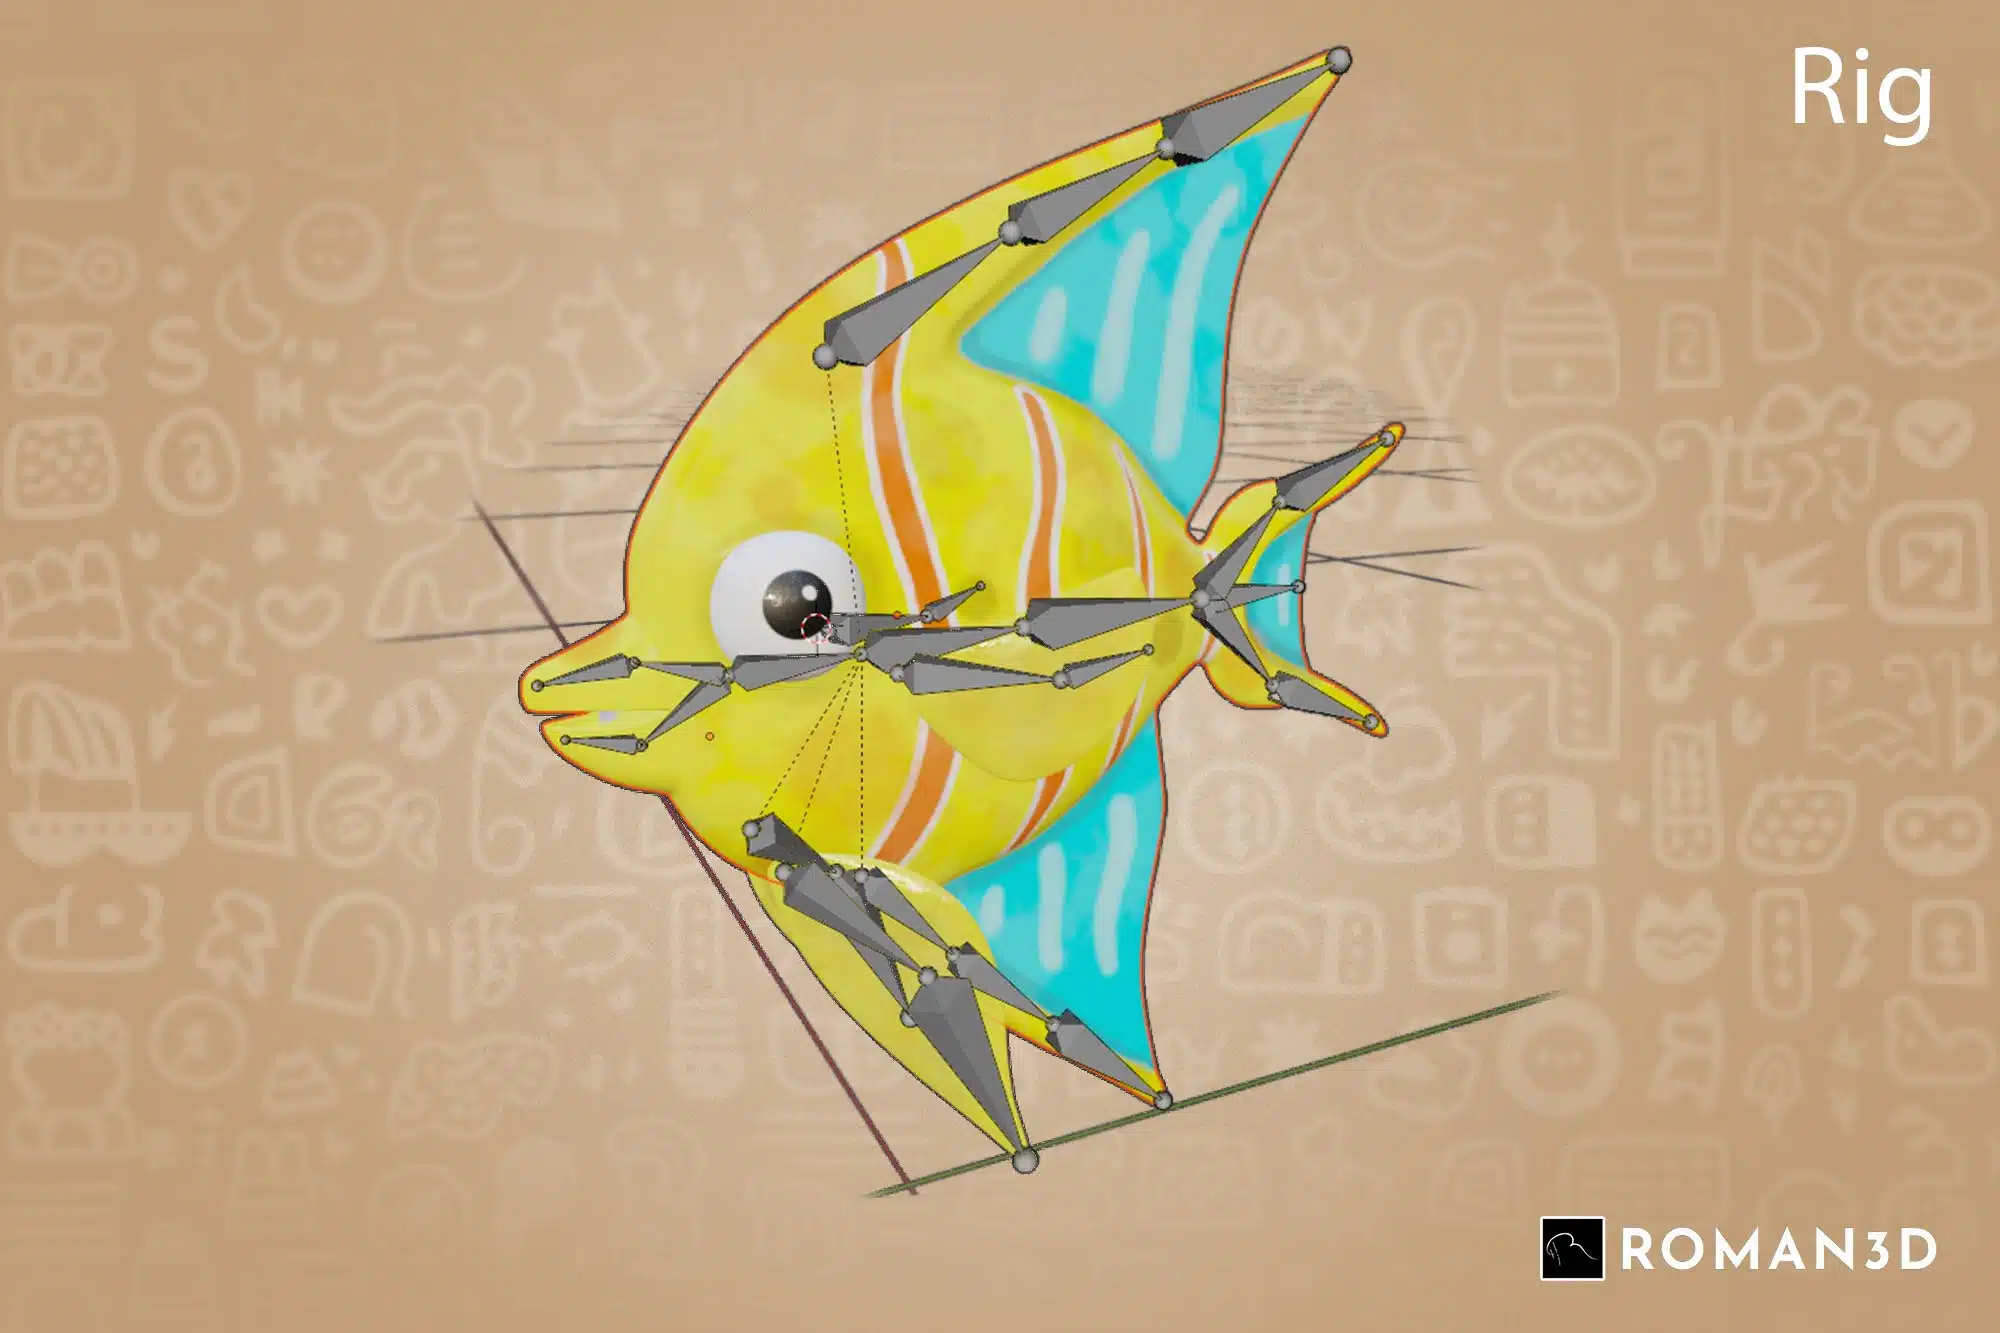
Rigging is the crucial step that allows bringing the character to life by giving it an internal structure and the ability to move.
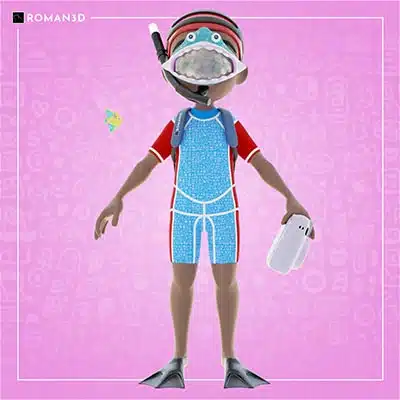
The Digital Skeleton of the Character and Fish
For the main character, a “manual facial rig” was created for the eyes, a very expressive area, while “blendshapes” were used for the mouth and eyelids, which are less expressive.
- The manual facial rig offers precise control over each facial muscle, allowing for realistic and unique expressions. It is ideal for characters that express a wide range of emotions, but it is complex and time-consuming to set up.
- Blendshapes are predefined facial animations. They are simpler and faster to use than manual facial rigging, but less precise and expressive. They are perfect for standardized animations and less costly.
The character’s body was created using auto-rigging, an automated tool that saves time and optimizes the creation process. This technique is particularly useful for less complex parts of the character.
The fish was entirely created with manual rigging in Blender. This approach offers precise control over each movement and ensures smooth and natural animation.
Compositing Audio Mixing
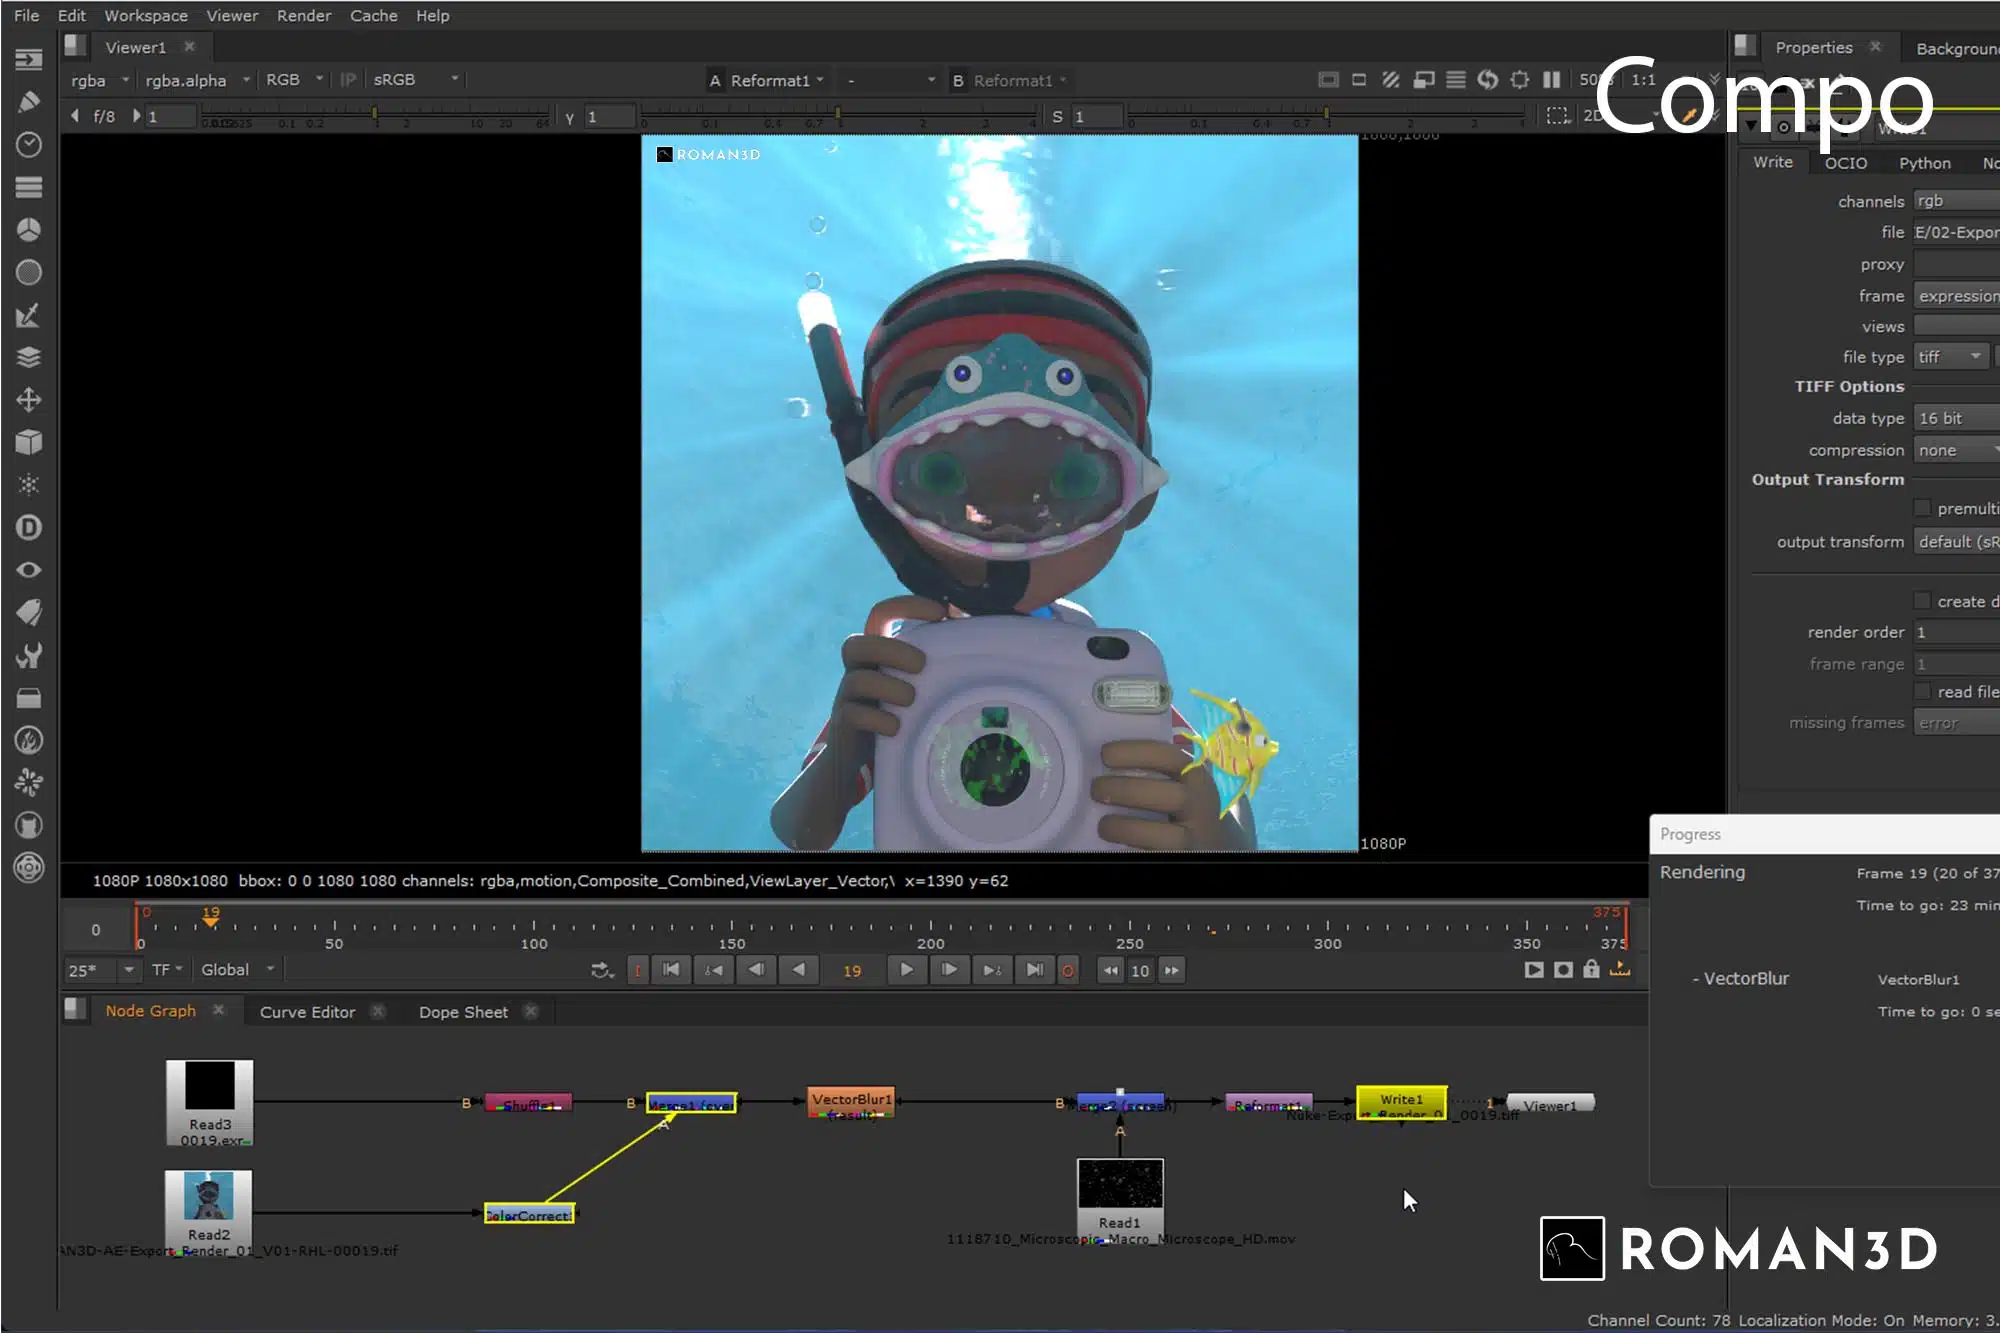
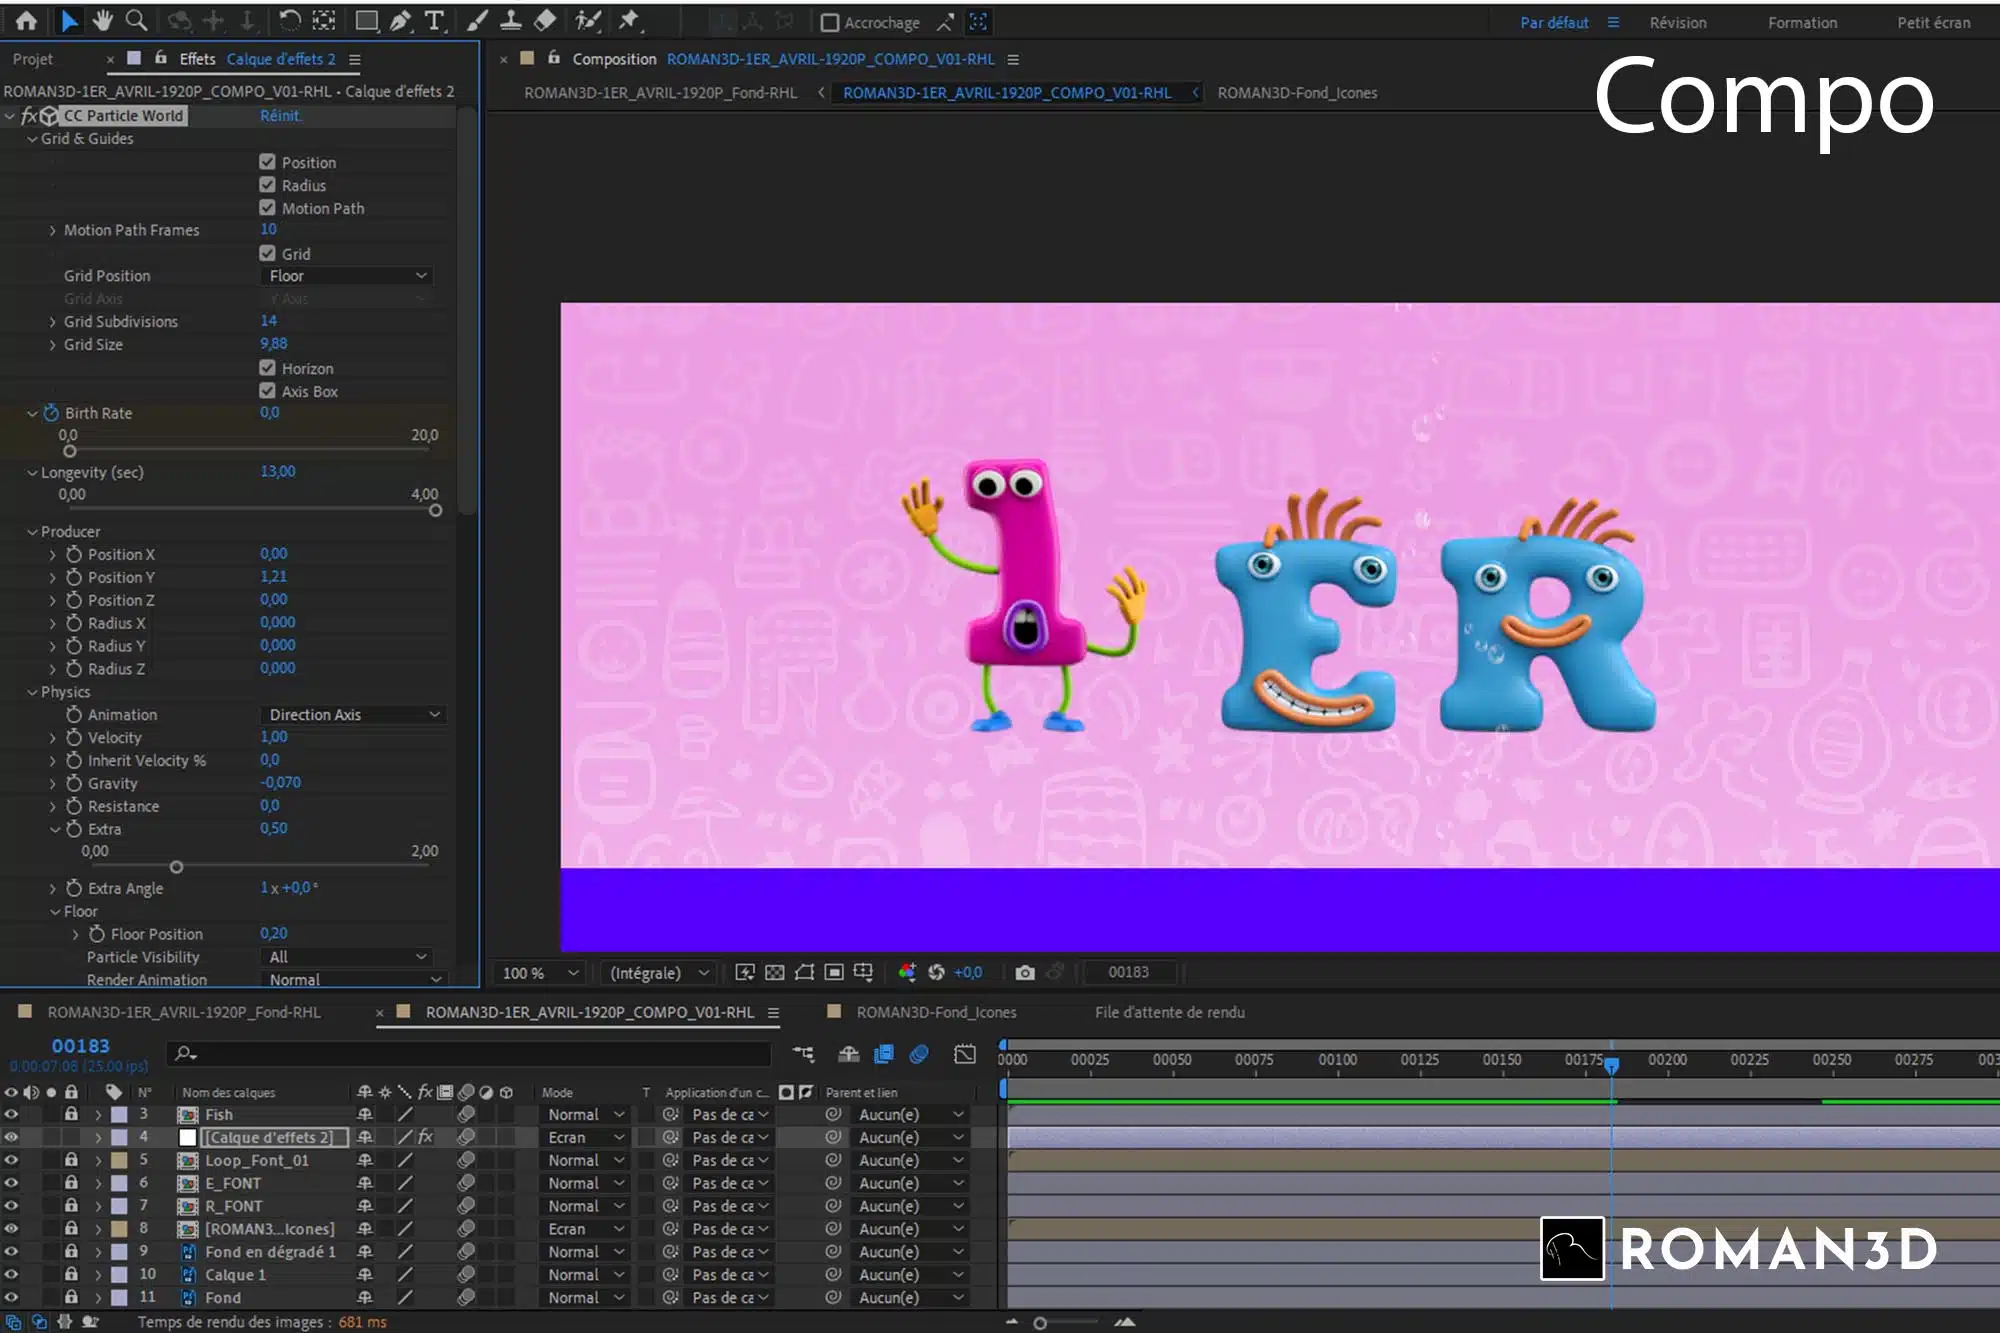
Compositing: The Final Touch That Enhances Your Video
Compositing is the final stage of video production. This is where all elements, filmed, animated, special effects, and sound, are assembled to create the final image.
For this project, two software programs were used:
- After Effects (Adobe) : for most compositing operations.
- Nuke X (The Foundry) : for the Vector Blur pass, allowing realistic motion blur.
The smoke cloud was integrated from a video bank to save time. The flash lighting was done on the 3D render and enhanced in compositing.
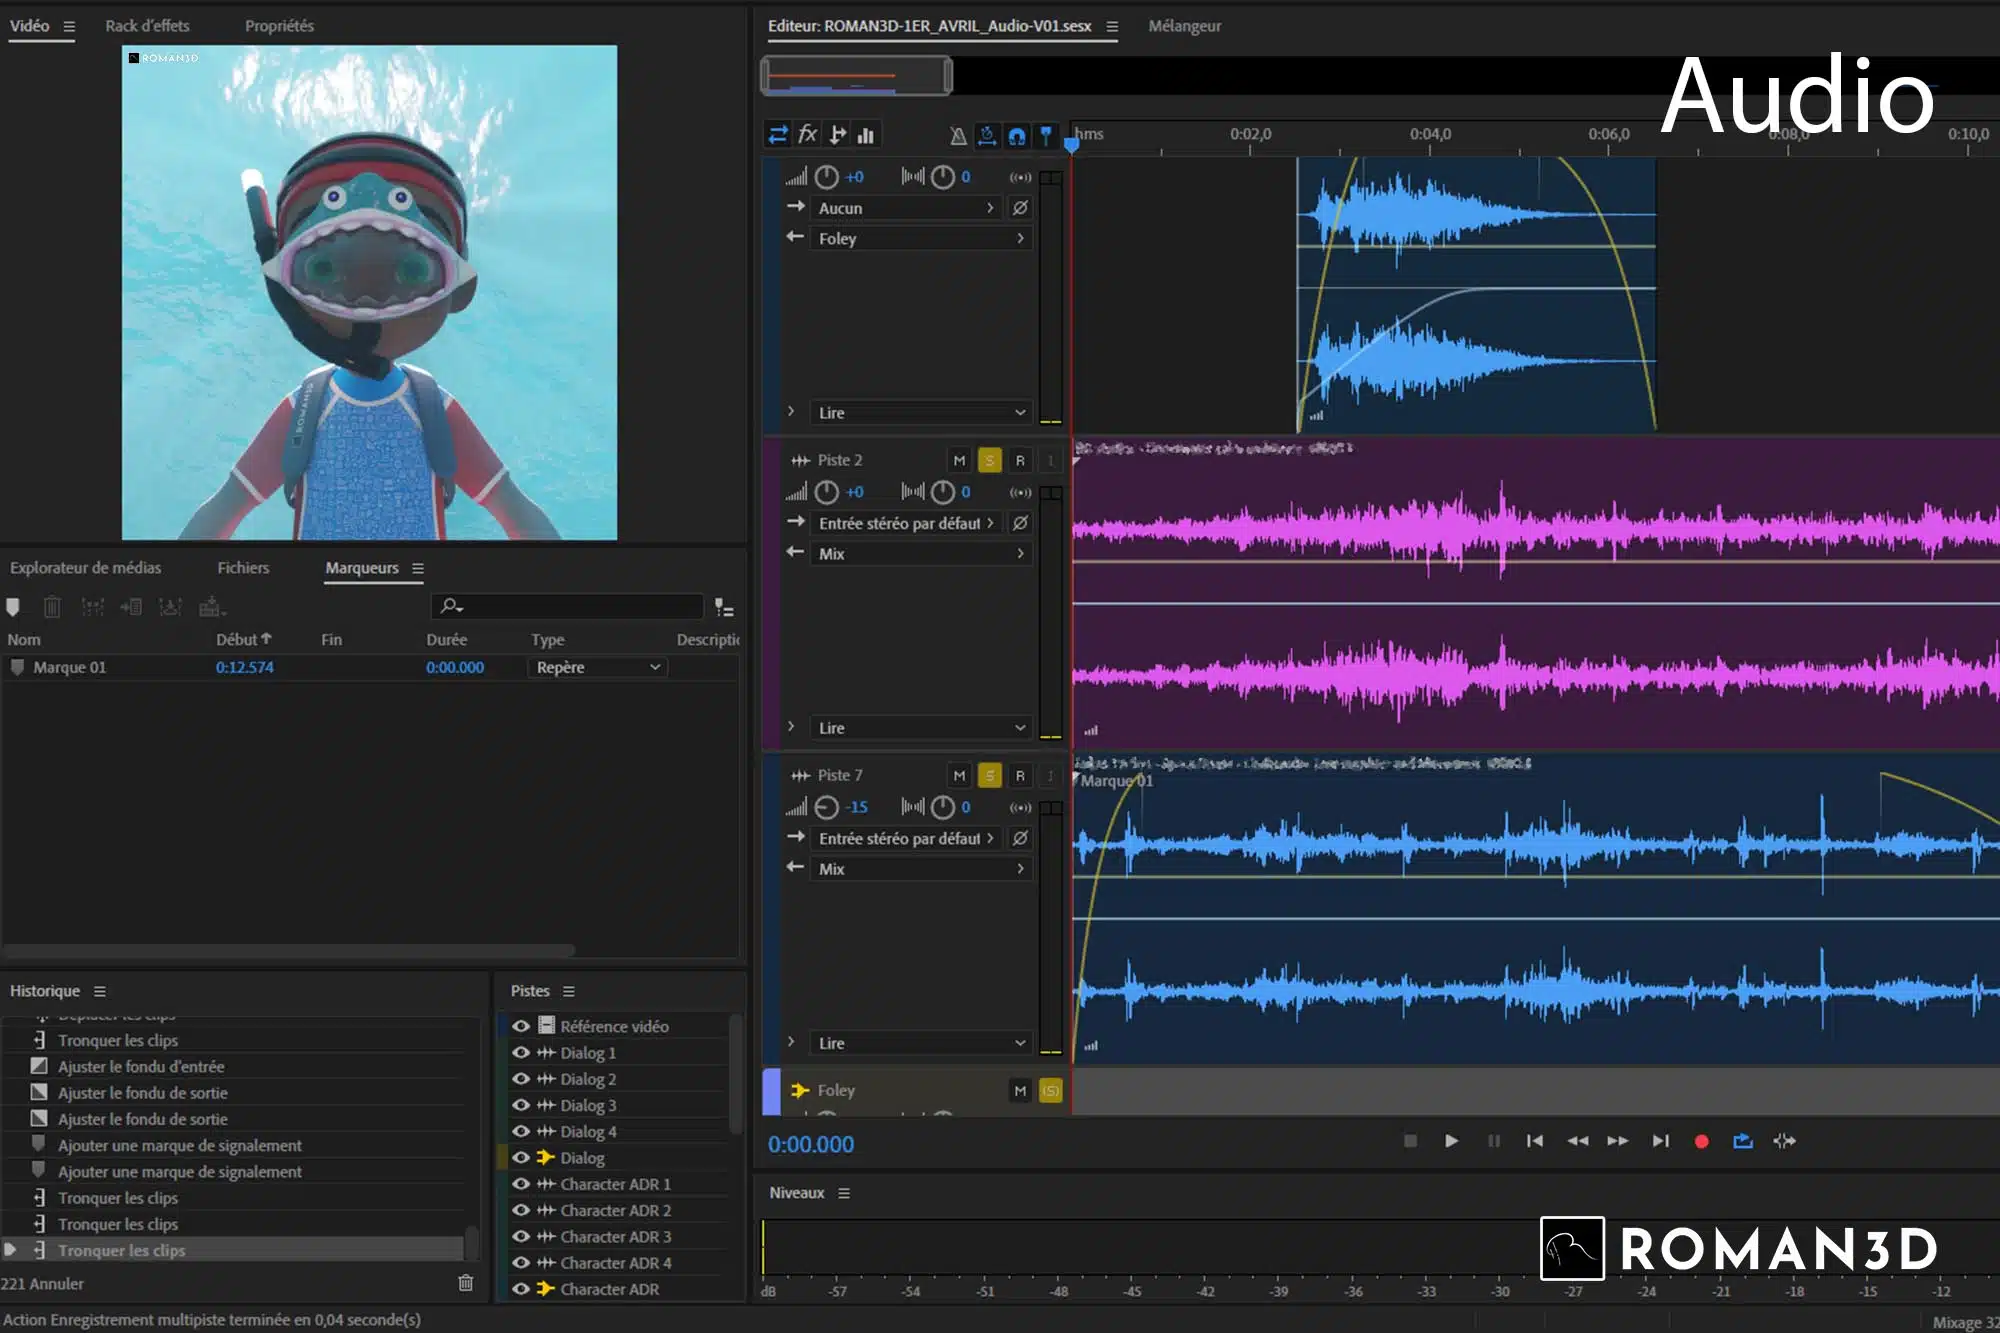
The audio mixing was done in Audition (Adobe) with sounds from an audio bank. The surprise: obtaining the rights to “Baby Shark” for social media!
The final composition of images and sound was prepared in Premiere Pro (Adobe) for the final export.
In summary:
- Compositing : assembly of all video elements.
- After Effects : main compositing tool.
- Nuke X : better for motion blur.
- Smoke cloud : video bank.
- Flash lighting : 3D render + compositing.
- Audio mixing : Audition + audio bank.
- Music : “Baby Shark” with acquired rights.
- Final composition : Premiere Pro.
This meticulous process brings the video to life and gives it its final look.
Conclusion


An Exciting 3D Project: Behind the Scenes of a Creation
Far from the glitter of the final render, creating a 3D video is a true marathon, where rigor and patience take the lion’s share. A challenge we took on with enthusiasm, not without a few cold sweats facing Blender’s quirks !
Because yes, 3D software is not free from bugs, and Blender is no exception. Unexpected crashes, mysterious errors … so many obstacles that punctuate the 3D director’s journey, but without getting discouraged ! Each bug conquered is a victory, each challenge overcome a step closer to the completion of our project.
It’s in this confrontation with the software’s uncertainties that lies part of the excitement of working in 3D. A fierce battle where perseverance and ingenuity are the keys to success. And what satisfaction to finally see our vision come to life, after hours of hard work!
So, the next time you admire a 3D video, remember the invisible work that lies behind each image. The work of passionate people who don’t hesitate to tackle bugs and challenges to bring the wildest dreams to life.
Don’t hesitate to ask us questions about the behind-the-scenes of this exciting project !
